
splicing?
It all starts with the rope
Before defining a splice, we must first understand what a ropeway is.
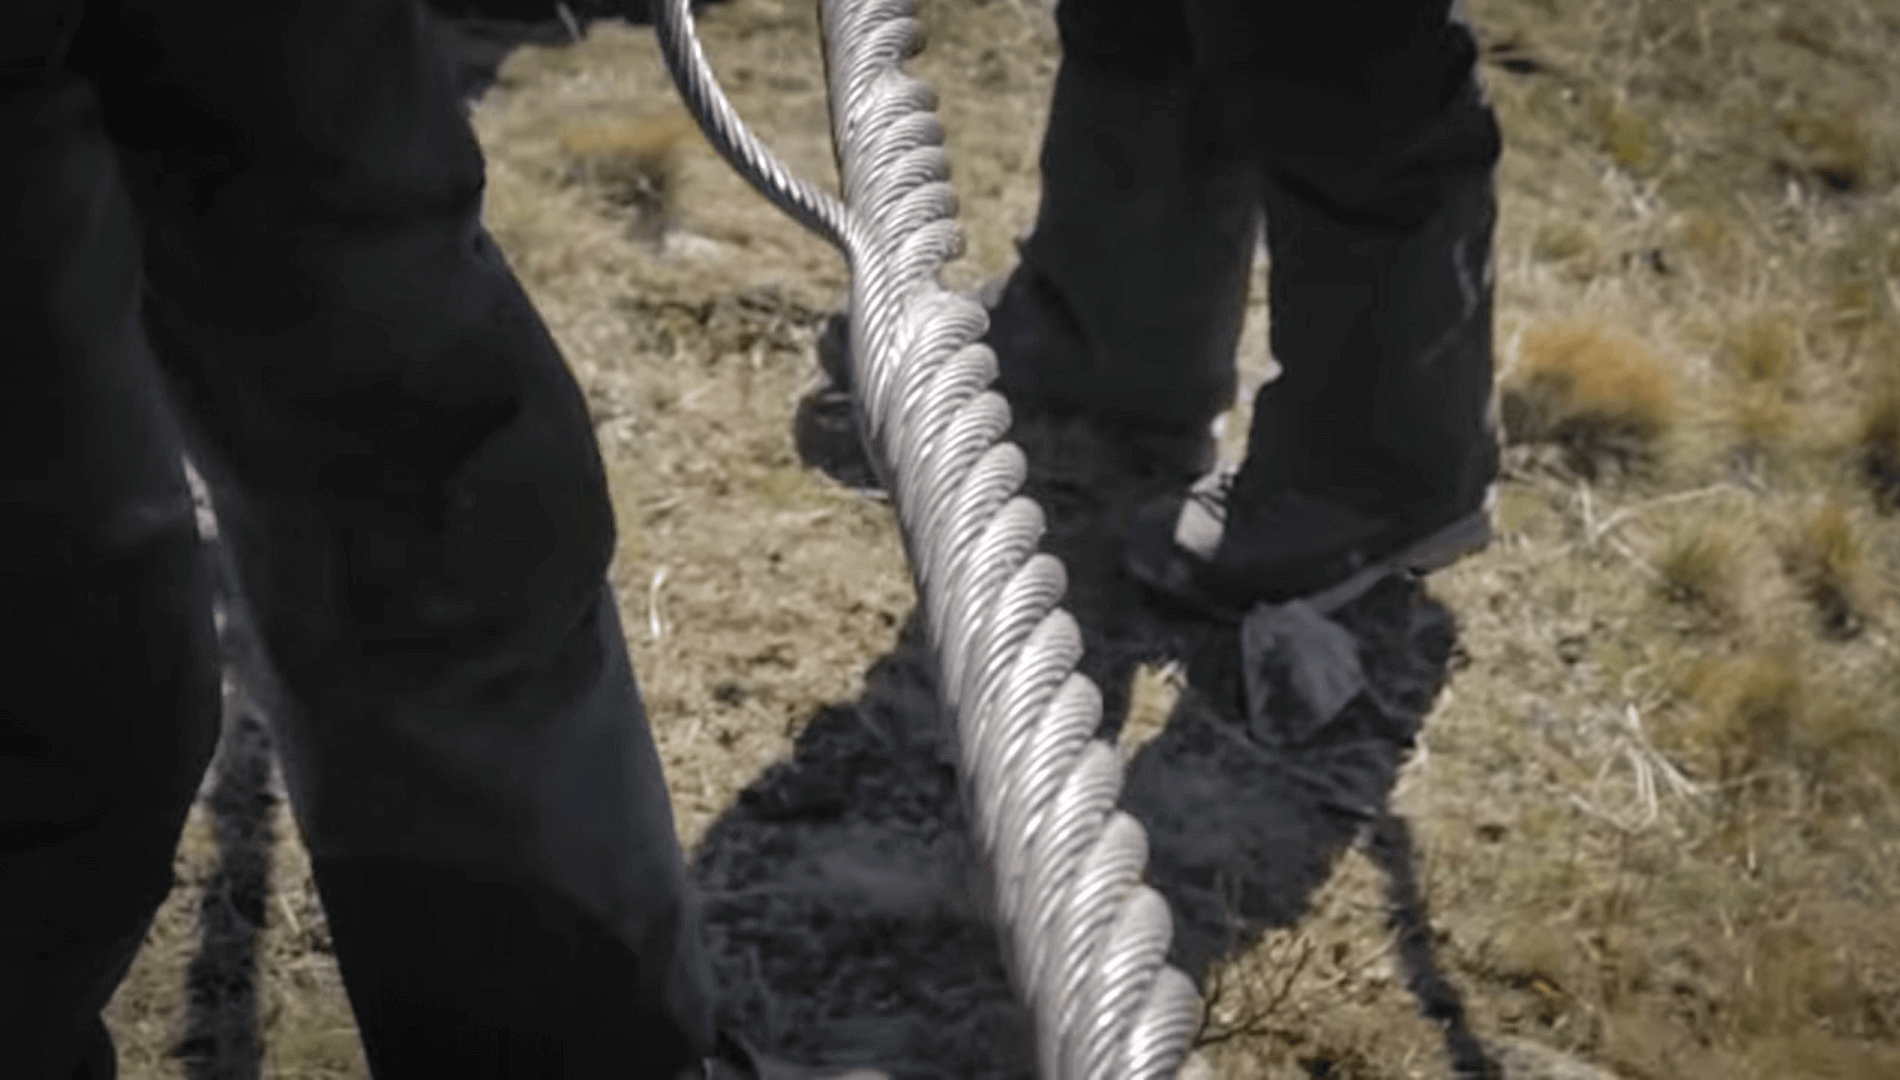
The cable
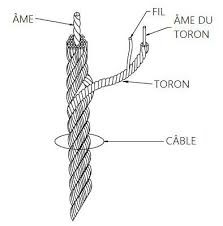
Diagram of a cable
After patenting (heat treatment by heating and then cooling), pickling and drawing, the wire rod is ready to be stranded.
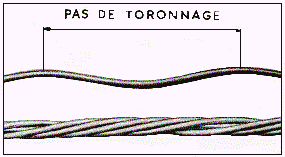
The strand is the simplest rope assembly: several helical wires are twisted regularly relative to each other in one or more superimposed layers around the strand core, also called the “strand lay length”.
A ropeway is made up of several strands, also wound in a helix around a central core serving as support.
First definition
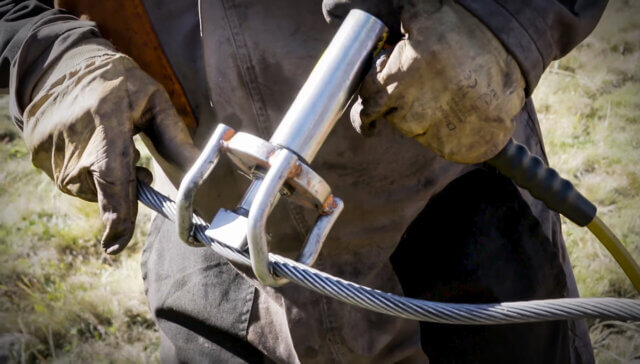
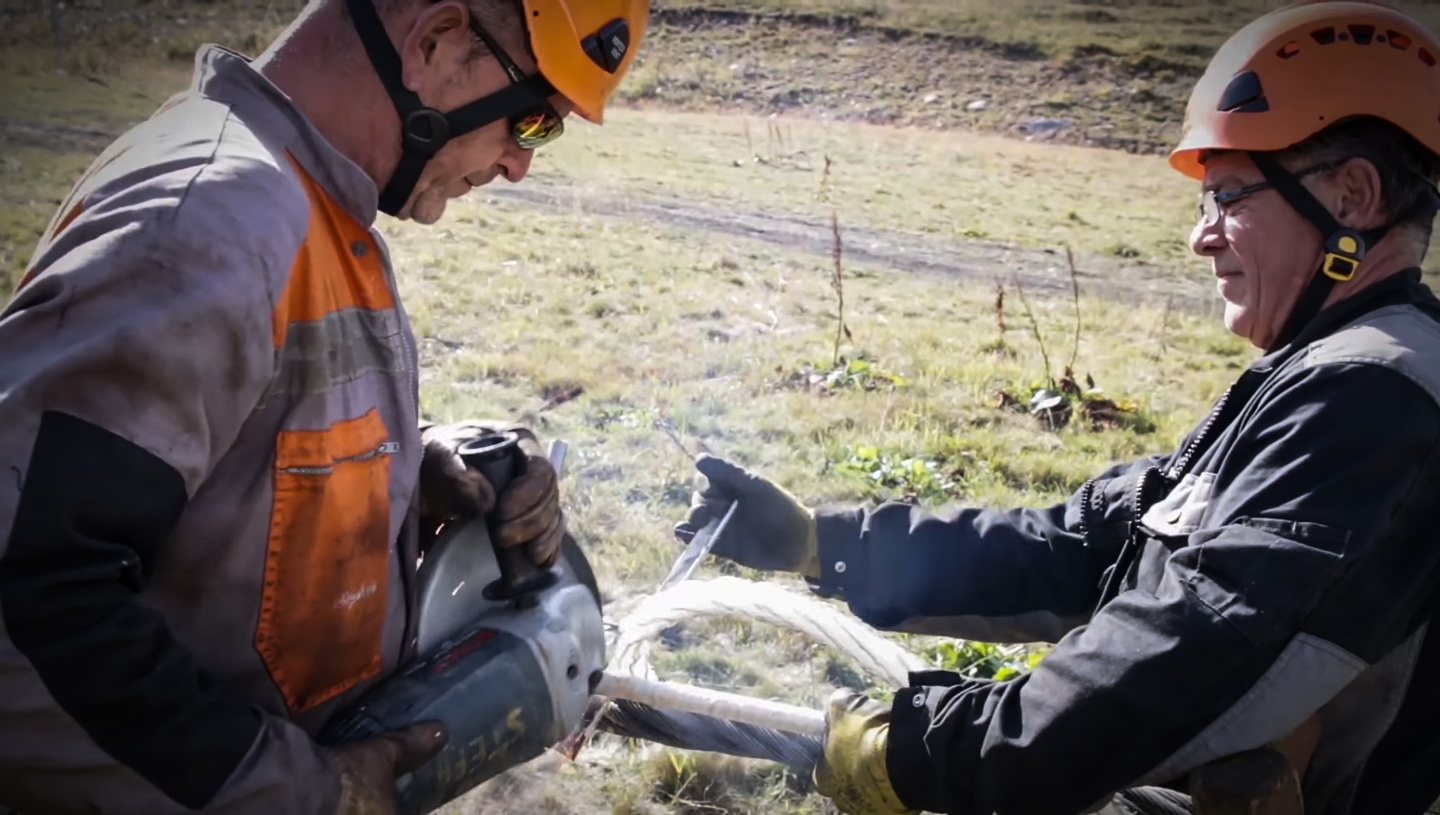
Splicing is the joining of two rope ends to create an endless loop. Its solidity and service life must be similar to ropes made in the factory by extremely precise machines. The definition seems quite simple, but the operation is trickier than it seems. Splicing is considered an art that requires great technical skills, a high level of expertise and a large workforce.
As it is carried out entirely manually, splicing requires rigour and know-how so that the rope connection point is invisible. At this attachment point, the rope must not exceed its nominal diameter by more than 10%.

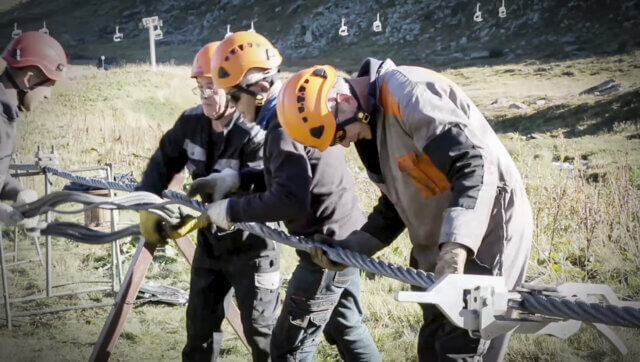
Splicing requires a large workforce
Grips on fixed systems (chairlifts, roller surface lifts, etc.) can be positioned in the splice area; grips on detachable systems (detachable chairlifts, gondola lifts, surface lifts, transportation of materials) can be coupled in the splice area. In detachable surface lifts, the splice must also pass through the bushings of the grips stored in the drive station.
These are the reasons why the rope in the splice area must meet strict requirements in terms of minimum and maximum diameter, in addition to the criteria of strength and service life.
It is interesting to note that, on older Poma gondola lifts, a radioactive pellet was inserted into the rope in the splice area. Carriers were not coupled in this area.
With the increase in transport capacities, in addition to the problem caused by the insertion of a (weakly) radioactive element into the rope, this solution has become obsolete.
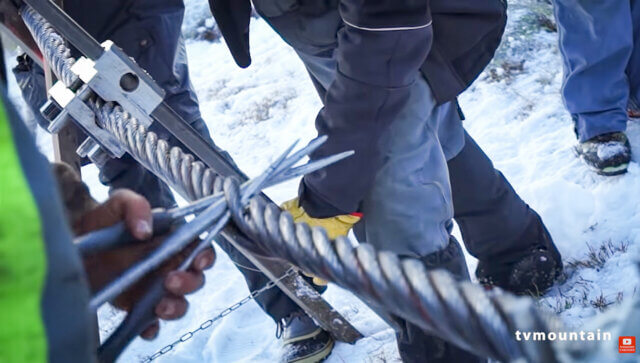
To do this, technicians called “splicers” use needles, or splicers, as well as specific tools for “knitting” between the strands. The proficiency of the splicer is decisive during the critical phases of “marrying” the rope ends and making the knots, during which he or she is assisted by several experienced operators.
Splicing is not restricted to ropeway transport. But in this context, it is done either for installing a new rope loop on which the carriers of a new system will travel, or for changing a rope or shortening it when it has become elongated in an existing installation.
Note that for shortening ropes, the method used is different from splicing. However, the general principles are the same.
what are the main steps?
The methods differ depending on the rope diameter and construction: ropes with 6 strands (most frequently used), 7 or 8 strands (only a few installations to date, with respect to the number of ropes in service). However, the basic principles and the main steps remain the same.
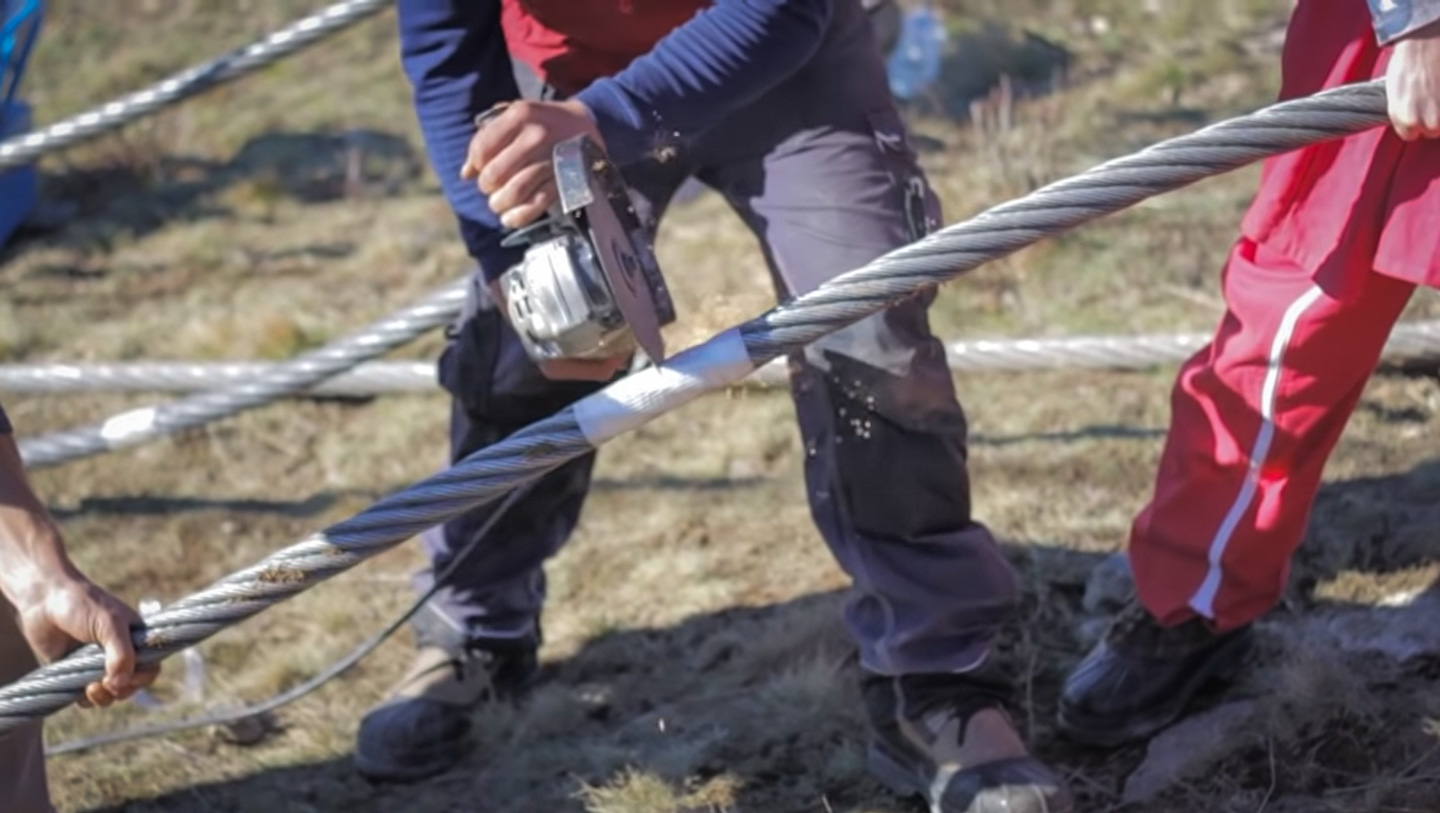
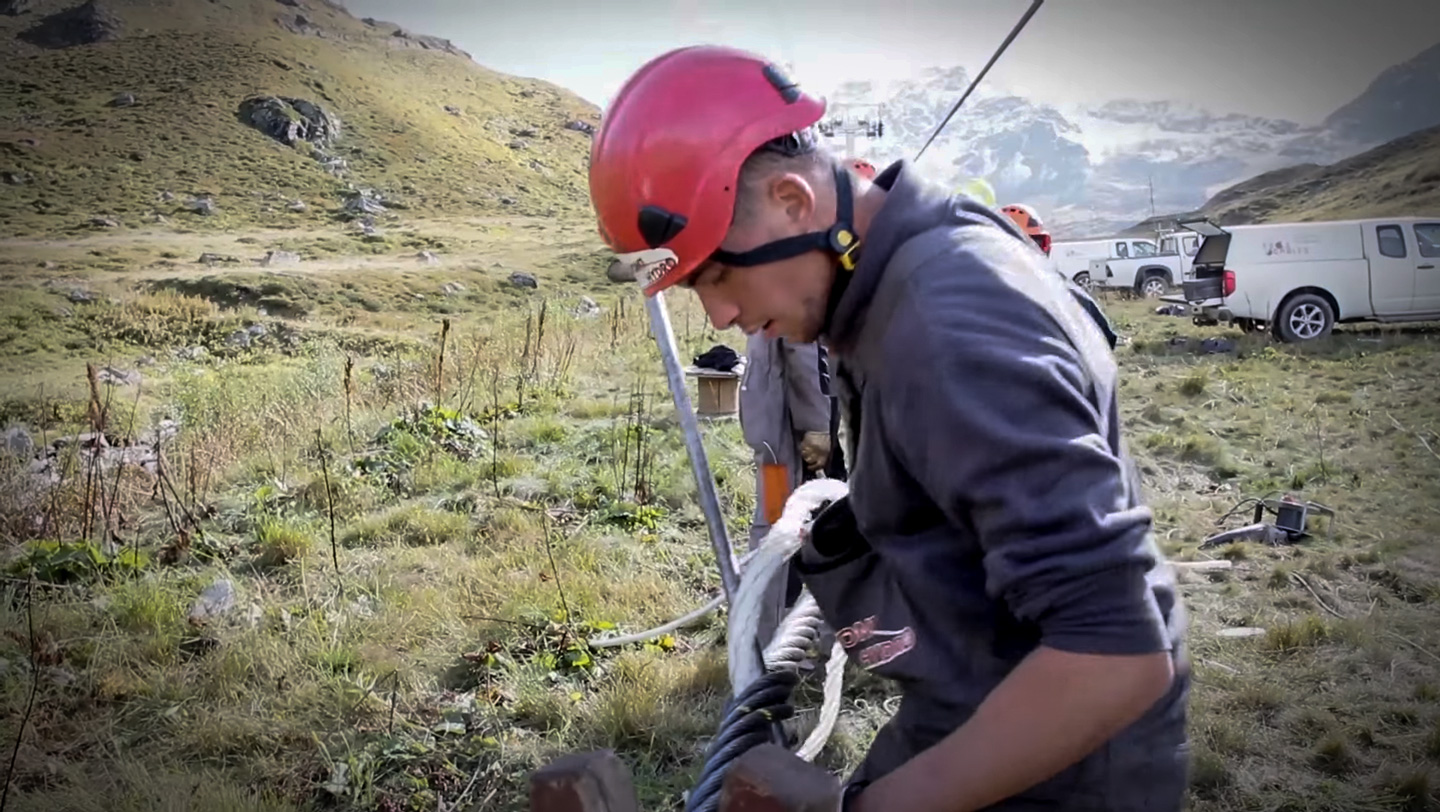
Step 1: Completely unwinding the rope to make the splice
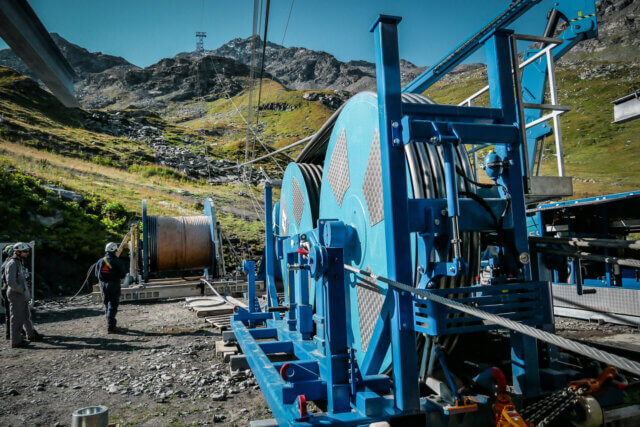
The rope is transported to the site on huge spools weighing several tonnes. The rope is unwound along the line between the departure station and the arrival station to form a loop on the ground. The two open rope ends are placed side by side to start “marrying” them.
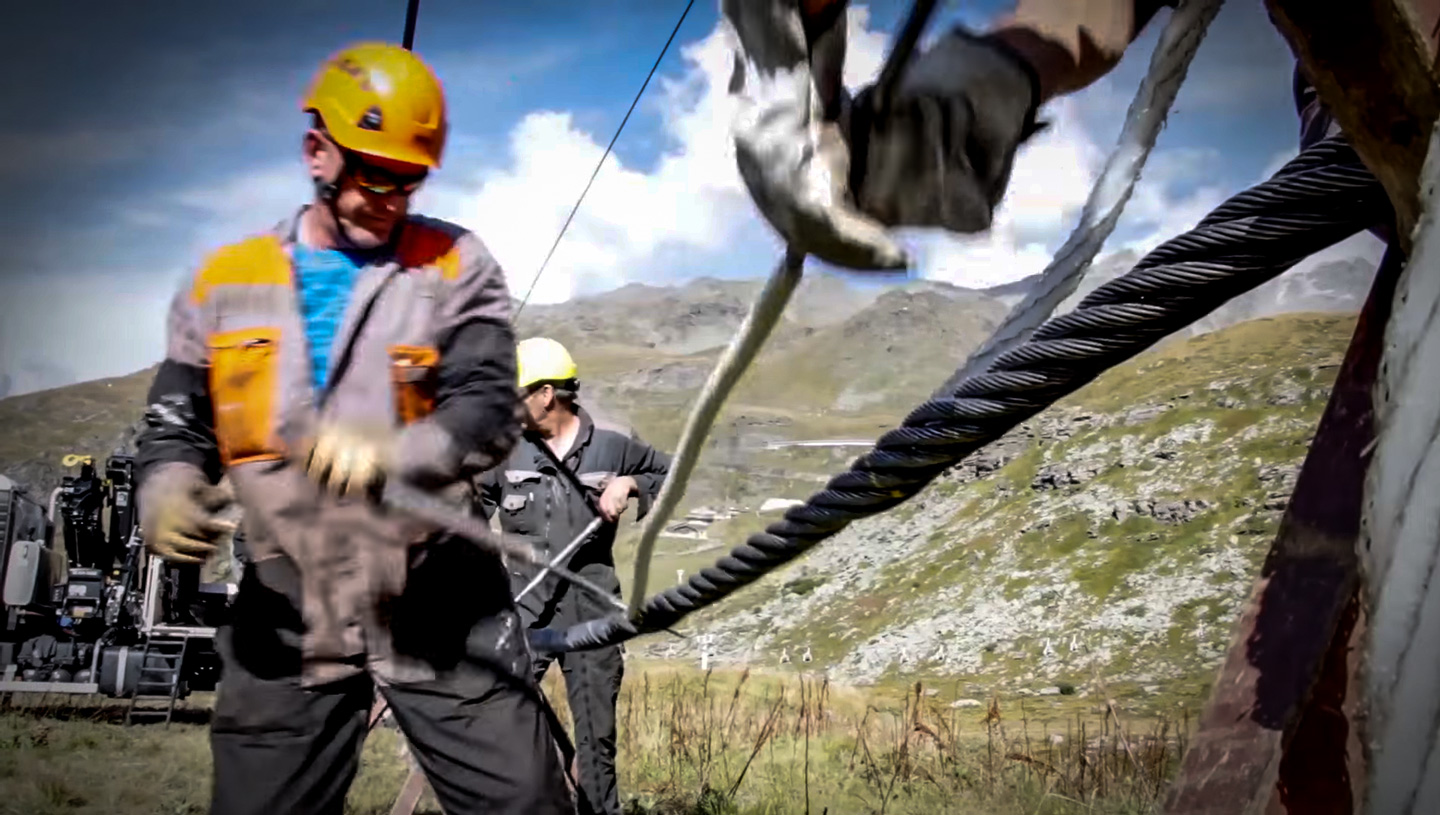
Step 2: Marrying the strands
The operators unlay the strands of the rope, and the two rope ends are then married.
This step is very important because we must not be able to see or feel a difference in diameter between the marriage point and the solid rope excluding the splice for the reasons mentioned above.
To achieve this, the technicians take a rope strand that comes from one end of the rope and replace it with the rope strand that comes from the other end.
There are different marrying techniques depending on the manufacturer, types of ropes and use cases.


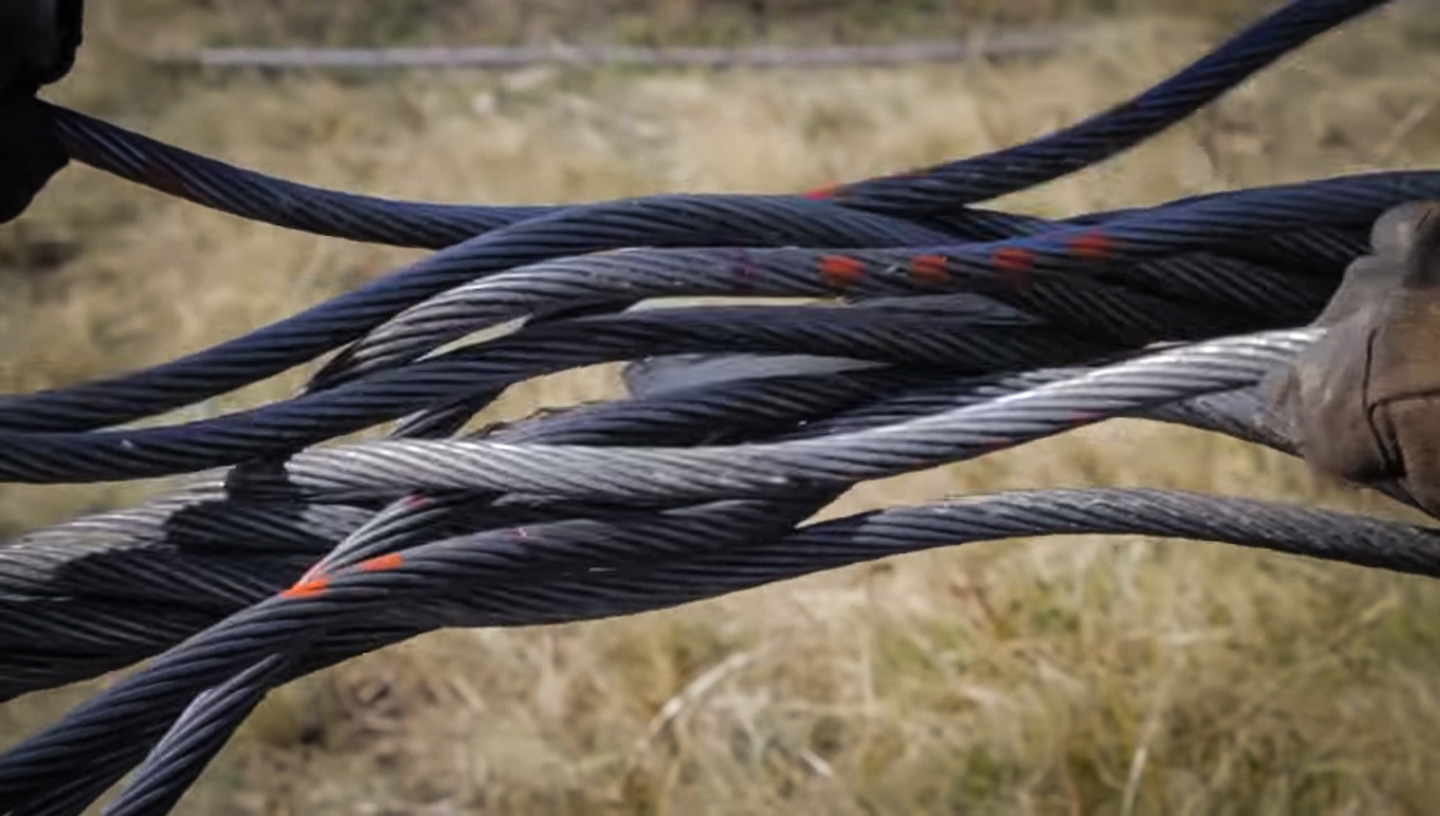

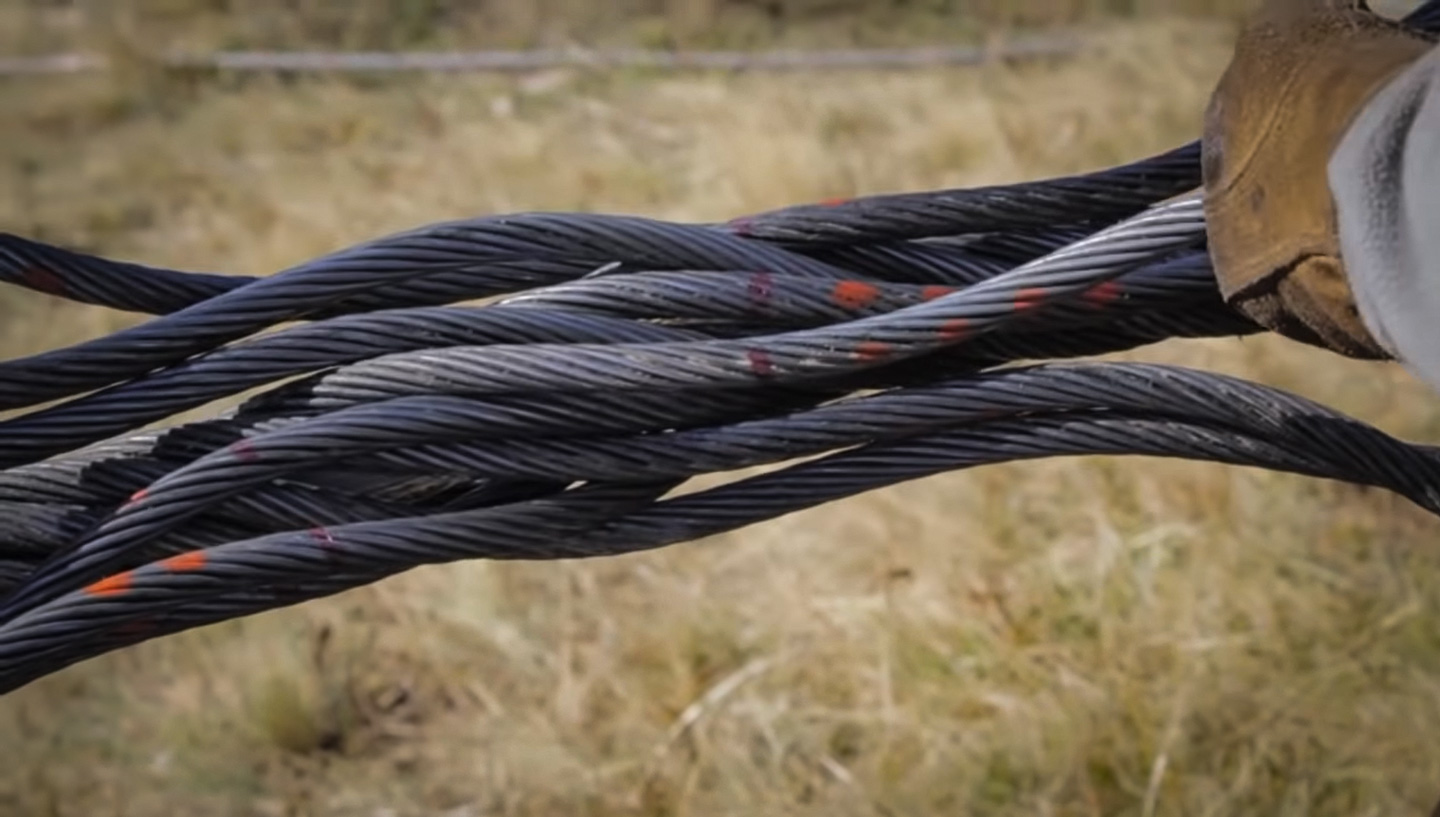


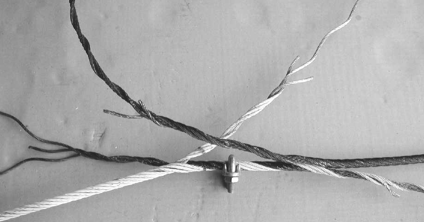


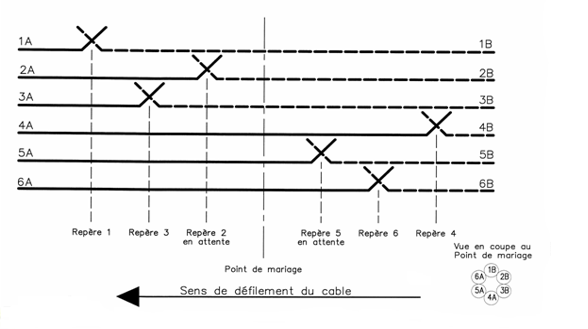
The splicer, supported by the many technicians who assist him or her, spreads out the strands to their final location according to the desired geometry and numbering of the splice knots..
The numbering often adopted for a 6-strand rope is 1.5.3.6.2.4 in the direction of rope movement.
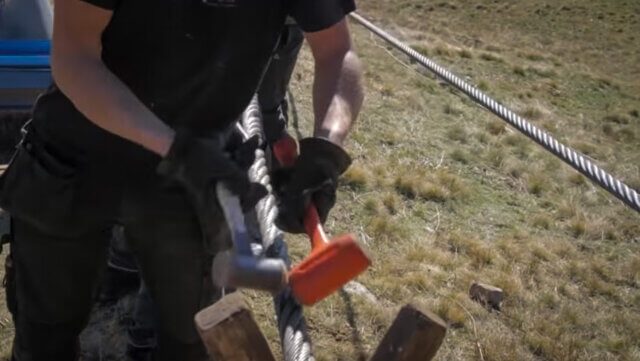
During this operation, the splicer must ensure that the strands are married correctly by using mallets, to maintain a precision equivalent to that achieved by the machines when the rope was originally manufactured.
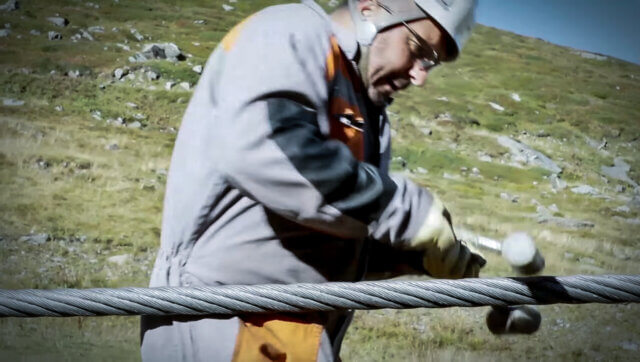
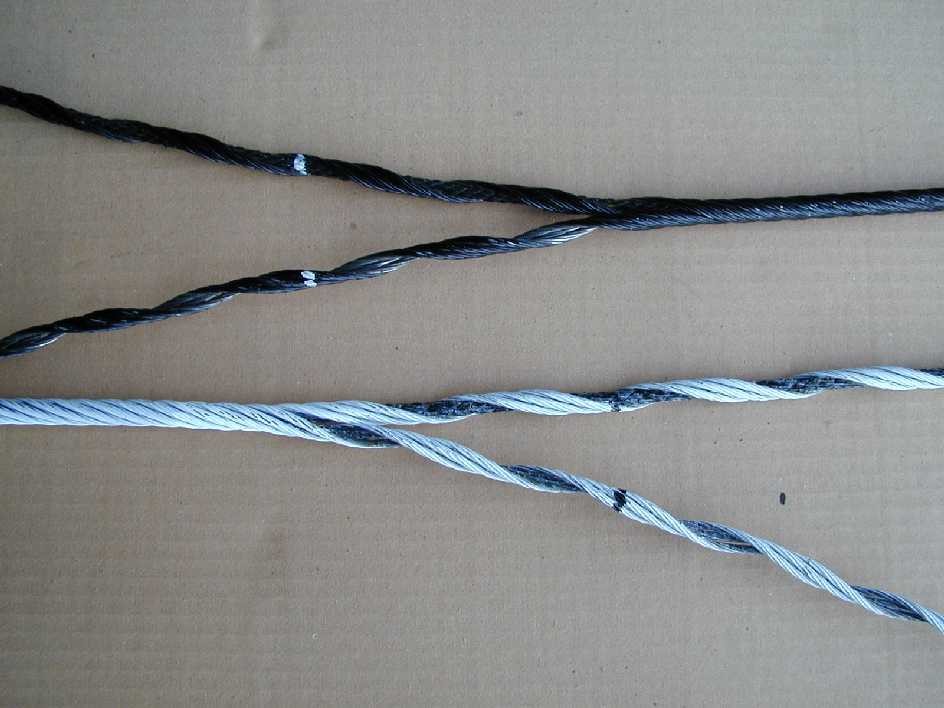
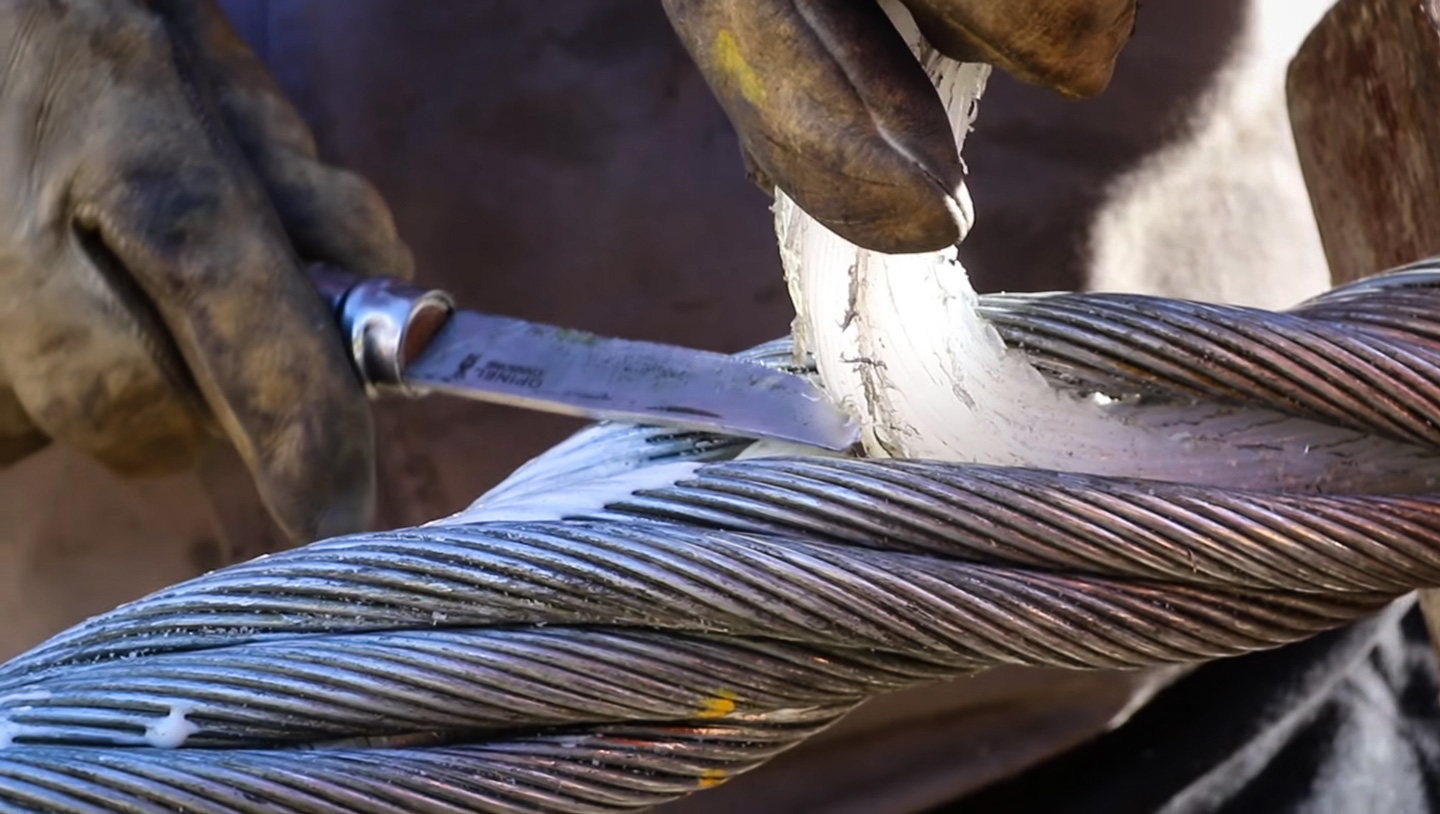
Step 3: Making the knots
This step consists of removing the plastic core that is inside the rope and then inserting the two strands that will form the knot inside the rope.
This phase is the trickiest: it is at this point that the splicer’s know-how and proficiency will be critical.
The strands must first be straightened to avoid any deformation as they will be inserted inside the rope to replace the core.
At the location of the future knot are the two strands that will form the knot.
The splicer then inserts the first strand into the rope, then the second strand to shape the knot using the splicers.
At the time of Jean Pomagalski, the parallel knot was promoted and defended by POMA. This knot required a little less technical skill and know-how than the cross knot, which is now predominantly used in ropeway transport. However, parallel knots are still found occasionally (old installations, other manufacturers, specific case with cross-lay). The reason is that this type of knot ensures better interlocking of the two strands forming the knot in ropeways with tensions that keep increasing over time (increase in capacities, therefore in the suspended weight and space between towers). At present, the parallel knot is mainly found on surface lifts for which the station staff still make some splices.


Step 4 : Tensioning the rope
Once the splicing is completed, the two ropes become one.
The tension take up is released.
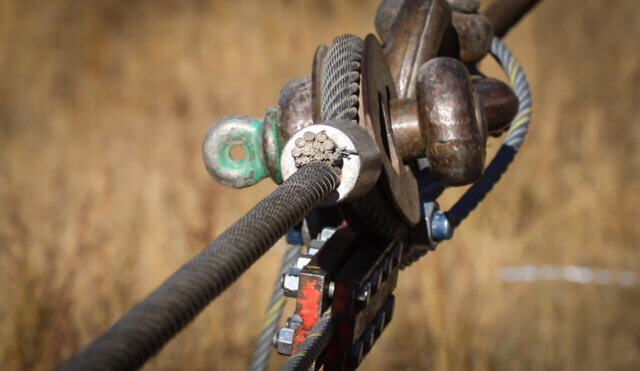
The splicer then checks the correct geometry of the rope as well as its compliance with the minimum and maximum diameters.
The rope is positioned on the rollers of the roller batteries.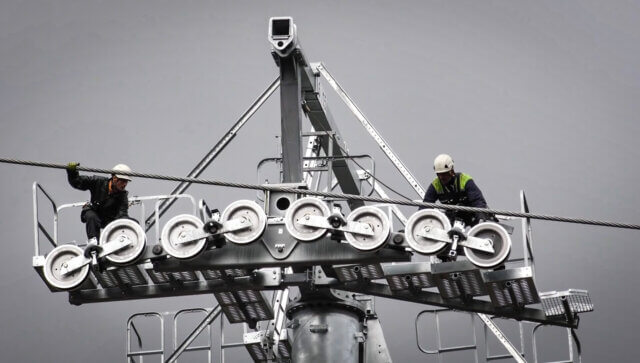
The rope loop is set in motion.
The unwinding and splicing operations stress the rope (handling, twisting, etc.).
This is why the rope must be detensioned. This involves running the bare rope (i.e. without a carrier) at nominal speed for a pre-set number of hours.
In addition, an authorised body also performs an inspection in particular through the magnetography of the rope to detect faults such as rope breakages (internal that are not visible on the outside)
This inspection will determine whether the splice and the entire rope loop is compliant before allowing the safe operation of the installation.

